Best Drones With Camera Under 200
This article is more than 2 years old
So, you are looking for best drones with the camera under 200 dollars. You need to identify your style first. By this budget, we are assuming that you are a beginner and just entering into the drones’ zone.
To help you out we have done a buying guide in this article you can read it up and educate yourself about what factors are important in quadcopter selection. As a pro tip when selecting drone look for a sweet spot. A drone which has nice fly time, high range, better camera and if possible than ability to customise as well.
| Name | Price | Camera | Flight Time | Range |
|---|---|---|---|---|
| Holy Stone F181 | Click Here | 2MP | ~ 10 mins | 100 meters |
| MJX Bugs 3 | Click Here | Buy Separately | ~ 18 mins | 300 meters |
| SYMA X8G | Click Here | 8MP | ~ 7 minutes | 100 meters |
| Parrot AR Drone 2.0 | Click Here | 720p - 2 Cameras | ~ 10 minutes | 50 meters |
| JJRC H26D | Click Here | 3MP | ~ 8 minutes | 300 meters |
| Eachine Racer 250 | Click Here | FPV 1000TVL | ~ 12 minutes | 1000 meters |
| JJRC H8D | Click Here | 2MP | ~ 8 minutes | 150 meters |
| WLToys V666 | Click Here | 2MP | ~ 8 minutes | 100 meters |
LIST OF BEST DRONES WITH CAMERA UNDER 200
Below is the list of best drones under this budget at our blog. Choose what suits your style the most:
HOLY STONE F181
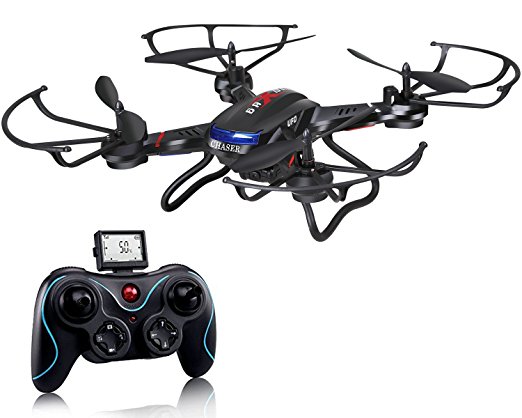
A great quadcopter for the beginners. If you are just starting out then this can be an excellent launching pad for your drones flying journey with a great plus of camera inclusion. The camera is 2MP and most drones come with similar resolution under this budget.
As your drone flying skills improve with time you will still enjoy flying the drone. Because it comes with 4 rates of flying. Initially, you want to stick with the slower rate so you can learn the art of maneuvering the copter. But as your skill level increases, you can experiment with higher rates. This will add to the fun and once you get settled with the controls, the enjoyment just begins at that point
It is a very affordable quadcopter on this list of best drones with the camera under 200 and offers valuable features. Apart from the 2-megapixel camera, you will have the return home key and headless mode. Headless mode combined with home return key will provide a headache free return of the copter.
The range is not very high, it is up to 100 meters. So, if you are in an open field then you need to move forward with the drone to balance the range. The flying time is under 10 minutes with an average of 8 minutes. This is quite less considering the charging time is 80 minutes. Therefore, our suggestion would be to buy the set of extra batteries along, so you can around with peace of mind.
MJX BUGS 3
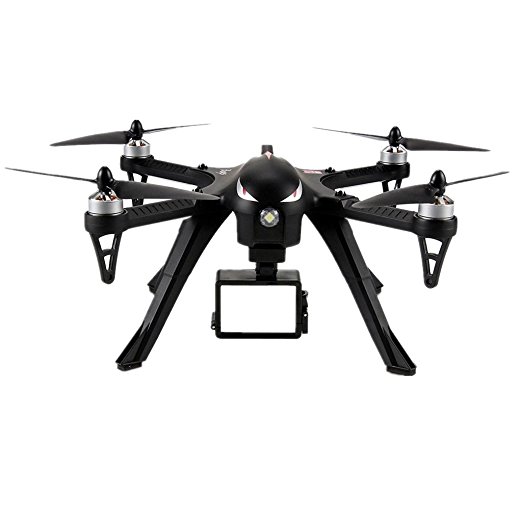
This is the best quadcopter in this list. It offers the best features along with a GoPro camera. All quadcopters have rotors which rotate the wings. It is the motor which rotates and makes the flight possible. The motor is of many types and the best quality motors are brushless motors. Regular quadcopters of entry-level, employ brushed DC motor. These motors have low battery life and have lower RPM.
In comparison, brushless motors have much better life and even have lower power consumption. RPM is much higher than the brushed motor. Also, the torque of the brushless motor is much higher than the brushed motor. Therefore, it is a Platinum feature which you receive in this price range tag.
What adds to the blessings of the brushless motor is the high 1800 mAh battery. Not only the motor will be consuming less power but the battery is also larger. Therefore, you get the flight time of 16-18 minutes. This is very high considering the average time in this list of best drones with the camera under 200.
It comes with low battery beep alarm. This is very handy as a forewarning will save you from a crash. After the beep, there is a time span of 2 minutes in which you must land the drone. The range is also a lot bigger, in comparison with Holy Stone F181 it can go as far as 250-300 meters.
The drawback which is also a benefit that it does not come with an integrated camera. You need to buy the GoPro or any camera which can stick with the gimbal and you are ready to enjoy vibration fewer camera views.
Syma X8G
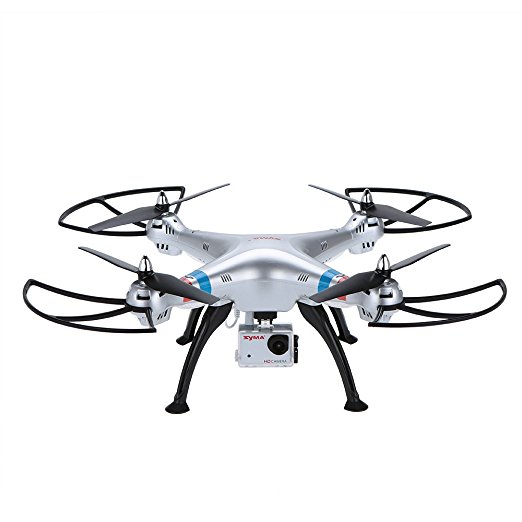
This is another drone which is best for beginners. The build is very strong and provides good features at the very reasonable price. It is the most recommended drone for beginners. You will learn a lot about this model as the strong build provides room for error.
Syma X8G offers something different in addition to the headless mode that is Intelligent Control System. You can change the orientation of the front or back of the design. So in addition, to the headless mode, you can also swap orientation with IOC system.
The camera size is very impressive at 8 megapixels. Most cameras coming up with drones in this list are very low in terms of resolution. 8 MP camera is very reasonable for aerial views at this price range.
Another great plus point is that the camera is detachable which indicates two points. One is that you can take the camera off, decrease the load and hence increase the flight time. Second, you can detach the camera and attach any other high-resolution camera like GoPro and record videos for 720p resolution at 60 frames per second.
It is an RTF unit take it out of the box, charge the battery to full capacity and it is ready to fly. You will also get the prop guards with the package. They serve the purpose of saving the blades. You also get SD-Card for the camera, extra propellers, and landing gear. With the opportunity to customise the camera and extra features. It is an excellent choice for someone just starting out.
PARROT AR DRONE 2.0
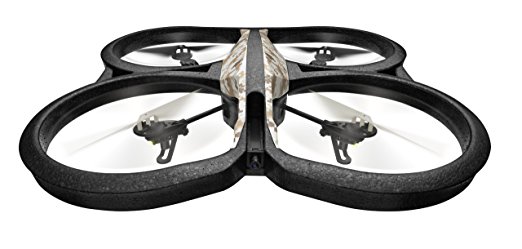
A very different and beautiful design. They have combined aesthetics with protection. The hoops around the blades are of a tough material and will save the blades from the collision. You have the option to choose different coloring option. So not only different shape but you also can have different colors to appeal to your likings.
What makes this quadcopter different is that it does not come up with a controller. It operates on Wifi communication with your smartphone. Simply download the app from App Store or from Google play called AR Freeflight and search for wifi signals. You need to turn of the mobile data on your smartphone and scan for wifi signals. You will find Parrot AR Drone signals and simply connect to it.
It is very crucial that you keep your mobile data turned off. As this is wifi connection you might experience signal problems. So in a situation, where the drone has gone off limits your phone will get auto-connected with mobile data and disconnect with Wifi source due to poor signal reception. This will lead to a crash and you may lose a very good copter.
Another benefit of controller exclusion is the regular updates you will receive from the drone makers. So you can expect the user interface to be getting better with every update. It does not offer the perks of the detachable camera, rather the camera is fixed but can record a 720p quality.
But the drawback of using wifi is very low communication range. The control range is only 50 meters and it also lowers battery time because of signal transmission. Therefore, the battery time is only around 10 minutes. This time is acceptable but the range is quite low.
JJRC H26D
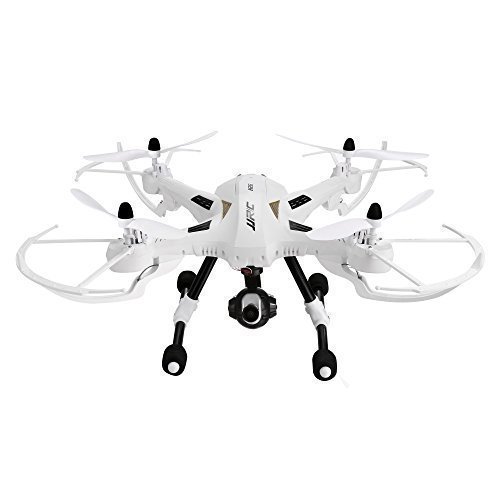
This is an extremely affordable drone with a range of up to 300 meters which is the prime reason why it makes into the list of best drones with the camera under 200. The camera is fixed and it is of 3 megapixels. Considering the price this quadcopter is listed at, this is an extremely good resolution with a view of 120 degrees.
The camera is mounted on 6-axis gimbal. Implying that you will get vibrationless, smooth camera transmission. The camera is also removable, so you can connect your GoPro with it but would have to take the headache of connecting with the gimbal. SD card is not included in the package so you have to buy that out separately.
The model also contains headless mode for ease of control and also has the key for home return. If you do not understand what these features mean then please check the table of content on this page. All these terminologies are explained in good detail. It is also equipped with LED lights so you can operate it during the night time as well.
In all these good factors, one of the problems is flight time. Although in this price range, flight timing of 6-8 minutes is still reasonably good. But for the range, this unit supports the battery timing is not balanced. Therefore, we would recommend buying spare batteries for support.
Eachine Racer 250
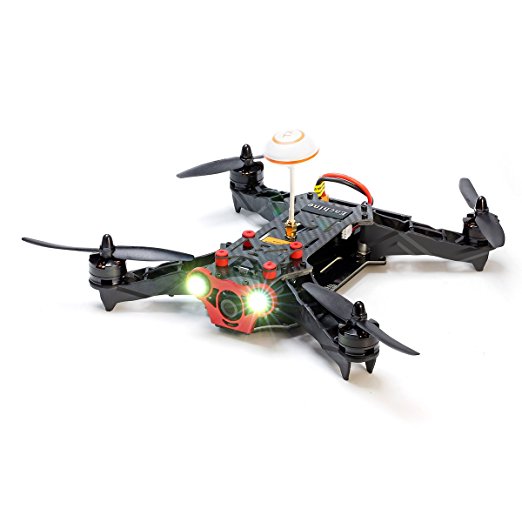
This an extremely popular FPV racer quadcopter. The price range is mid category and it can be set up within few minutes. The 1500mAH battery is of quite a reasonable size with the battery time of around 12 minutes. The controller has a left-handed throttle.
What makes this drone included in this is the list of best drones with the camera under 200 is the 7 Inch screen which comes integrated with the remote controller. The display has the backlight so you can see the screen even in sharp sunlight. The camera resolution is crisp and sharp on the big 7-inch display screen. The displays have an indicator which shows the battery level. So, you can plan your landing minutes before the battery runs out.
Another great fact is that you can change the LED lights on the quadcopter. So, if you are racing especially during the night Eachine Racer 250 will stand out from the crowd. So, with the camera, you get great speed. Another great aspect is the spare parts. It is customisable and you can change the machine with a myriad of spare parts available by which you can customise the machine.
So you must be thinking what is the range of this drone? Well, it is around 1km that is huge for the price it is available. But we would recommend remaining under 500 meters range because you can not risk losing it away far from you where it would be almost impossible to retrieve in case of collision crash.
Apart from all great plus points, the problem is that the material it is made of is relatively brittle. Arms and antenna can easily break off if you go little careless. So, pay extra attention not to collide with anything while in the air. Another problem is the charger, it’s not durable. If you are planning to buy this quadcopter then buy an additional charger. Lastly, if you are a manual geek then you would have a hard time understanding it. It is not written up professionally.
Original JJRC H8D
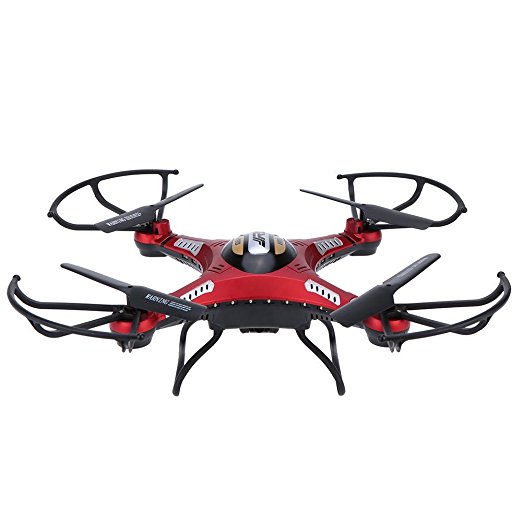
A 2MP pixel camera under the price of 200 dollars. It is RTF drone which means that all you need to do is to take it out of the box and it is ready to fly. The unit has a range up to 150 meters which are better than most mid-range priced drones in this list. It is very stable and can be a great beginner drone.
The flight time is on the lower side around 8 minutes as the battery is also small around 500mAh. Although battery timing is low but that is balanced out with a reasonable range of 150 meters. Battery charging time is 80 minutes which matches average charging time of other drones. In comparison with its predecessor H8C, this model H8D is much quieter. JJRC has corrected this issue by introducing bearing on the motors.
You can adjust the camera angle to choose your choice. You can view the results on 4.3 inch LCD screen. There is a bit of pixelating issue on the screen once in a while, but overall it is quite balanced by HD 2 megapixel camera reception. The unit also includes a headless mode with one key home return.
Among the problems is the user manual which is written in quite advanced text and you may find it hard to read. Apart from that, it is quite balanced drone in mid-range category.
WLtoys V666
Apparently, it looks like a copy of Parrot AR quadcopter but you need to overlook this fact. It is RTF – Ready to Fly. It is a 5.8GHZ system with the ability to remove the antennae allowing you to upgrade it. Therefore, this model offers customisation which is not available in all quadcopters.
It is equipped with a smart control to switch the sticks function. It means that you can switch to right-hand stick if you wish to use if for throttling purpose. A nice 2MP 720p camera is mounted on anti-vibration gimbal. A great plus is that in this price, you will also get a 4GB MicroSD card that can be slotted into the camera and it will record video in there. There are buttons on the remote that will help you start or stop recording on the memory card.
The motor does not have the bearings. You will experience high noise. If you are planning to buy V666 then it would be a wise decision to buy bearing if you are offended by high noise. The good news is that the batteries and Motors are both quite inexpensive. So you can buy extra spare parts and fly this machine with peace of mind.
It has a 1200mAh battery, the size is quite reasonable and it can last for 8 minutes. Battery charging time is almost 60 minutes. The flight is quite stable and you can even do flips with this machine but acts like this will only reduce the machine life. You can fly it around at 100 meters and it works perfectly under this range.
Overall it is a very good starting FPV quadcopter, the value and features are a great and low cost of spare parts include it into our list of best drones with the camera under 200 dollars.
BUYING GUIDE FOR BEST DRONES WITH CAMERA UNDER 200
So you have taken the decision and decided to go buy a camera drone. But there are some factors which you should weigh before you take any decision. We have done the research to compile the list of factors you should understand before you choose a drone.
It all depends on your style of flying a drone, your skill level and of course on your budget. Below is the list of factors that will directly influence your decision making.
FLIGHT TIME
Well if it is your first time to buy a drone then you will be surprised how low flight time is for drones. Flight time is the number of minutes a drone can fly in the air. Notice we used minutes, not an hour that just means you cannot get much flight time in single flight.
Typically flight time of even the best drones is well under 30 minutes. Models with entry-level or mid-range budget fly for around for 20 minutes. But you can solve this problem of low flight time with spare batteries. Drone batteries are chargeable so you can take a set of batteries fully charged. This will increase your flight time and you can enjoy the view more.
Depending on your choice of drone, the batteries cost is related to the model you bought. So if you bought an entry level cheap drone then it will have lower battery cost. While for expensive drones the cost for the battery is also more. If you had a drone before then you must have recalled the day when you had your perfect view from drone’s camera but your battery was almost dead to continue.
SKILL LEVEL
Drones can get complicated to fly, especially to maneuver a turn, sometimes gets tricky. If you are a beginner and not in a headless mode which I will explain, you will end up taking wrong turns or even worst case crash your drone. So, my advice would be for beginners to start off with a beginner drone and learn the art of flying first.
It takes time but sooner or later you will become a drone pilot. Buying a good expensive drone can actually save you from disaster. As these drones come up with come home button. With just a push of a button, the drone will come back to its transmitter or starting point. For ideal come back, the GPS enabled drones to work with pinpoint accuracy.
GPS SENSORS
GPS bring in automation to your drone. Apart from getting your drone coordinates, GPS is much more than that. You can set a point on your GPS and set drone to automatic mode, it will automatically reach that point and get the view for you. This is a great feature as it will help in reducing the time taken by a human to reach a point. Therefore, you can enjoy more meaningful or optimized flight time.
If your drone has come home button and with GPS enabled then your drone will safely return to its take-off point. But if your drone does not have the GPS and still offers the come home button feature then your drone will simply start to fly in reverse direction. Therefore, you will still be required to take some turns. It can get super tricky if your headless mode is turned off. As you will be pressing to left turn but your drone would be moving towards the right.
One drawback of GPS enabled drones is the power consumption. GPS consumes battery to operate. Therefore, your flight time will decrease if you use the GPS. It is advisable to automate the drone with GPS so you can optimise the battery usage with perks of GPS.
HEADLESS MODE
Drones come up with two sides, one is called the front while the other is called the back side. When the drone takes off and you turn the analog stick in an upward direction, the drone will move forward. This is because the backside of the drone is facing towards you. So it works all good as soon as you are moving forward and taking left or right turn.
But it can get really tricky if you take a sharp turn and the drone front side is towards you. This will invert your controller analog stick. So now when you turn the stick right, the drone will move towards the left and vice versa. If you are an inexperienced drone pilot then it will become a headache for you. What can save you is to get the backside of drone back towards you somehow or you can press the bring home button.
The above solutions will not work perfectly unless GPS is integrated with the bring home button. To save from this problem drones come with a special mode call Headless mode. Turning on the headless mode inverts the controller when the backside is facing away from you. So for inexperienced flyers, the headless mode is a problem solver.
UNBOXING TYPE
It is important that you know what type of drone you will be taking it out of the box. Apart from X and H shaped frame there are three kinds of drones that come from manufacturers.
a) READY TO FLY or RTF
As the name implies, simply unbox the package and your drone is set up to a fly with straight away. Just make sure that the batteries are fully charged before you decide to fly the drone. RTF or ready to fly drones and are ideal for those who are just starting out with the drones.
b) ALMOST READY TO FLY or ARF
The second type of drone which requires assembling. This is for DIY hobbyists. ARF drones will require you to take a headache and assemble the drone. Assembling the drone will make you learn about the parts its made of. It will be a learning experience as with the passage of time when your drone part wear out you will need to replace them with spare parts. A beforehand knowledge can in this zone can help you out with the struggle.
c) BIND N FLY or BNF
So what to bind? Well, it is the transmitter. You will have to bind a transmitter and receiver unit of your choice. Bind it with your drone and you are ready to go. Different transmitters have different benefits like the difference in ranges. So if you have a BNF drone along with the choice to integrate camera of our choice then you have a customisable drone. Bind N Fly drones are for more seasoned drone pilots. So if you are just starting out the RTF should be your landing zone.
RETURN HOME FUNCTION
Like headless mode, return home function is another problem solver. It will automate your drone flight in two ways:
a) WITH GPS
If your drone has GPS included, then pressing the turn home button will bring back drone to your starting point. Make sure you lock the starting point on your drone before taking it off.
b) WITHOUT GPS
Without GPS your drone will simply take a backward journey in reverse direction. You would have to handle the movement and turn with your controller.
It is worth noting that if you turn on the bring home button without GPS feature on your drone, then you must turn on the Headless mode. Otherwise, your drone will be automated to return back in reverse mode and inverted switches can lead to a crash.
CAMERA
Depending on your brand and choice of drone, you can get different options with a camera. Some will allow you to detach the camera while others are integrated with the body of the drone. You can also attach GoPro with some models. It just depends on your style of flying. You have to buy GoPro separately, we have reviewed it here in detail.
Drone usually do not come with high-resolution cameras. The view is usually of few megapixels. For capturing the birds eye view or scenery, it will suffice your requirements. Cameras do increase the weight of the drone and draw more power from the battery. Therefore, battery enabled cameras along with GPS will extract battery juice even faster. You must have realized how crucial is to have spare battery by now.
GIMBAL
It is holder which will keep the drone’s camera level. You will get stabilized motion along the pitch, roll and yaw of the drone. It will help your drone to get a non-shaky camera view, in whatever direction your drone is rolling. So, a camera with a gimbal can give a massive improvement in result. After all, nobody likes a shaky footage.
CONTROLLER
This is the transmitter unit which sends command or directions to your drone. The transmitter or controller unit provides the first person view broadcast by the drone’s camera. Not all controllers come with a built-in LCD. But if your controller does come up with it then the display screen may also tell you the altitude, speed and position. This makes your flying experience more interesting.
SPARE PARTS
You will be very lucky if your drone does not crash. But sooner or later on a bad day its very much possible that your drones crash or some part of the drone starts to malfunction. In any case, as time goes by your drone performance will go down as the parts age. To solve it out, you can buy spare parts of your drone and reattach with the body.
Therefore, do keep a track if your model offers spare parts. Expensive models spare parts cost more than the entry level cheap drone.
RANGE
The range is the distance the receiver on the drone can receive commands from the controller end. Typically, a starting drone can have a range of 100 meters. But as you move towards high-end drones with sophisticated transmitters and receivers, the range can be around several kilometers. Therefore, we advise that you check the range of flight. It is very crucial, going beyond the mentioned range means you are entering the danger zone. In no time your connection may get lost and you get a crashed drone.
VERDICT
After reading this detailed article you must have observed that most of the drone in this list of best drones with the camera under 200 have many features in common. All the drones are priced within the same range and are great for someone who is just beginning to start out.
MJX BUGS 3 is relatively high-end drone when you compare with all on this list. Eachine racer 250 is also a great drone but it is for someone who is into racing. So you need to match what suits your style of flying the most.
If you are just planning to start out and you find drones very appealing. Then you need to start out with one unit to learn and experience the art of drone flying. Try Syma X8G it is very affordable for someone reluctant to experiment. Once you get comfortable with maneuvering the drone you can go ahead and customise it to intermediate level.
So don’t wait for more, get a drone for yourself, get outdoor experience the joy of handling a very stable machine in the air.